Free Instructions: How to Knit Red Heart Sashay Ruffle Scarf

If you would prefer a video tutorial, please click here: https://www.youtube.com/watch?v=WVGHP8-NS94
Please do not copy, sell or offer these patterns as your own. Please share a link to my blog here for other's to find my free patterns, in doing so, I am able to offer more free patterns to everyone.
Skills:
You will need a basic knowledge of knitting, casting on and casting off.
You will need:
Knitting needles (size 9 or 10)
Scissors
Your choice of mesh ruffle yarn
Notes:
You will need a basic knowledge of knitting, casting on and casting off.
You will need:
Knitting needles (size 9 or 10)
Scissors
Your choice of mesh ruffle yarn
Notes:
A. Normally, using a different size hook or pair of knitting needles will not make a difference in your work when using the different brands of ruffle mesh yarn. The holes are already created for you to work with, so when you cast on, you are not concerned with being a tight or loose crochet/knitter. It does not really matter. I prefer to use a size 9 or 10 wooden needle, because it is what I have found to work well in a comfortable manner, for this yarn. I find the work can slide easily off metal or plastic needles, so I just prefer to use wood or bamboo or something similar that is not so slippery.
B. When working with this particular ruffle yarn/fabric (there are more than a couple brands on the market), if you find a knot in your yarn/fabric as you are working it, you can do one of 2 things: (either one you choose, you will normally not see it once your scarf is complete!)
1. You can work right over the knot as if it were not there….or…
2. You can usually untie the knot, and overlap the fabrics (one facing one direction and one facing the other, just a few inches will do), so that you have 2 layers crisscrossing and work right through them following the pattern without interruption.
3. I recommend unrolling your entire skein of yarn as shown below, rolling it onto a toilet paper roll or paper napkin roll. This takes about 45 min or so, but it will dramatically cut time of working making your scarf, because it is already stretched out for you and ready to use. Otherwise, you have to stretch it out a few feet at a time as you work, and this does take way more time.

4. The number of stitches you cast on can vary. I normally use 8-10 stitches and I knit until I have used the whole skein. If this is your first scarf, you may want to try 6, 8 or 10 stitches, knit a few rows to see how wide your scarf is and see if you like the width. You can easily pull out the work and start over, as this only takes a few minutes to re-create. Less stitches = narrow, more stitches = wider scarf.
Tips for working your pattern:
Tie a knot in the end of your yarn/fabric leaving about ½ inch tail. Don’t trim too close, as it can unravel a little easier when washing, leaving a short tail is more secure I have found. If will not show when your scarf is completed.

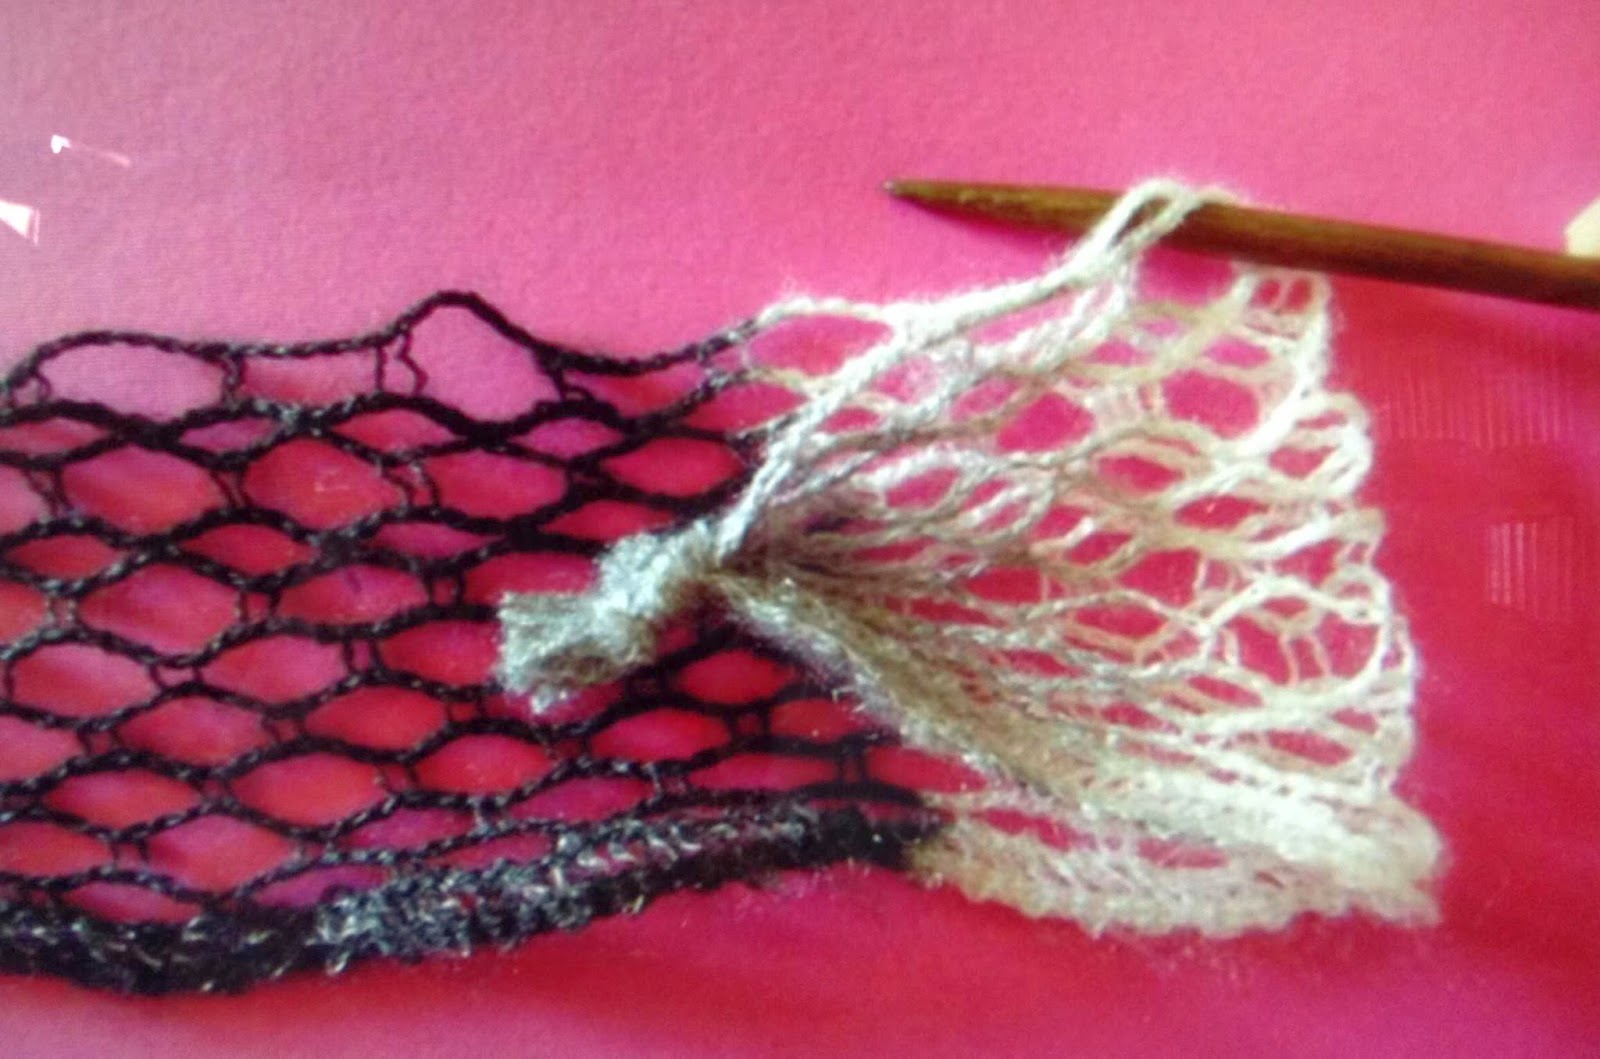
You will be working into every other hole. This gives you the ruffle effect that you won’t get if you knit into every hole. Notice at the top of the photo, there are small “tracks” or stitches to create the larger stitches you will be working with. You will be working in the larger holes, skipping every other large hole.
Notice the bottom edge of the yarn. It is different than the top for the border effect. Some yarns have glittery threads woven through it, or pompoms or other décor for the border/bottom.
I use the very top row to cast on and knit with as shown below..

Working your knit pattern:
First fold your yarn over a few inches like the photo shown below, lining up the first few holes as I am pointing out below. Fold toward the front, as this will hide it as you begin working.

Cast on your stitches, by inserting your needle from front to back, skipping the next hole, and coming around to front again and inserting needle again from front to back into next stitch/hole. Repeat until you have 6, 8 or 10 stitches cast on your needle (this is up to you as I mentioned above. Notice, the first 2 stitches you cast on, will be double because you folded over the first few inches. You will work the layers together as if they are one layer. See next 3 photos below for what this will look like.


Once you have cast on the number of stitches you choose, you will begin knitting in a very similar fashion to knitting with yarn, except that your stitches are already created for you, and you don’t have “free yarn” to wrap around the needle, you will be using the existing holes to do this. Begin knitting by skipping the very first hole available of the working yarn as shown below. Insert your needle from front to back as you would when you normally knit. Take the working yarn, skipping the first hole, and place the next hole over the back needle (normally this would be a “yarn over” with normal yarn. Complete the stitch as you normally would, bringing needle to front catching the ‘yarn over” on the working needle, and dropping the stitch from the needle that the stitches are cast on to. (Next few photos)


Repeat for all stitches to the end of the row, keeping in mind that the last couple stitches will have 2 layers that are worked together from when you folded over the yarn right before you cast on your stitches.
Here is what your first row completed should look like..

You will have a tail of working yarn left, carefully, using a crochet hook, pull the tail through the last stitch. Tie a tight knot in the tail as close to the stitch you just pulled your tail through, and cut the left over tail, leaving about ½ inch of yarn (similar to when you tied the knot at the beginning of this pattern. Shake out your scarf.
Congratulations! You have completed your scarf and it is now ready to wear!
Congratulations! You have completed your scarf and it is now ready to wear!
No comments:
Post a Comment