Sunday, February 22, 2015

FREE Infininty Ruffle Scarf Loom Knitting Pattern Instructions

FREE Infinity Ruffle Scarf Loom Knitting Pattern Instructions

Infinity Ruffle Scarf Video Tutorial


In this video, I show you how I loom knit with Red Heart Sashay ruffle yarn to create an infinity scarf. Most instructions I found created a strip in which you had to sew the 2 ends together...however nothing that was a true infinity scarf done in the round. This loom knit version is my answer so that you can create a true infinity (in the round) scarf with the ruffle yarn.
 
I show you how to cast on, loom knit and then cast off & finish the scarf. I also show you how to choose the correct size loom because when you finish, your scarf will be no where close to the size of the actual loom opening. I believe this is due to the lack of elasticity in the ruffle yarn, compared to standard yarns worked on the loom. Check it out and see if this works for you!
 
Happy Creating!

Wednesday, February 18, 2015

FREE Quick Easy 20 minute Crohet Newborn Hat Instructions

How to Crochet Quick Easy Newborn Hat Instructions

Easy 20 minute crochet baby hat pattern instructions

 
In the above video I show how to crochet a easy newborn hat that whips up quick, in about half an hour or less if you already have some basic crochet experience.
My youtube channel also offers a simple newborn cocoon pattern instructions that matches this newborn crochet hat, which makes a great set to give as a gift, use for your own precious little one, or a simple photo prop. FREE Quick Easy newborn cocoon pattern tutorial here
 
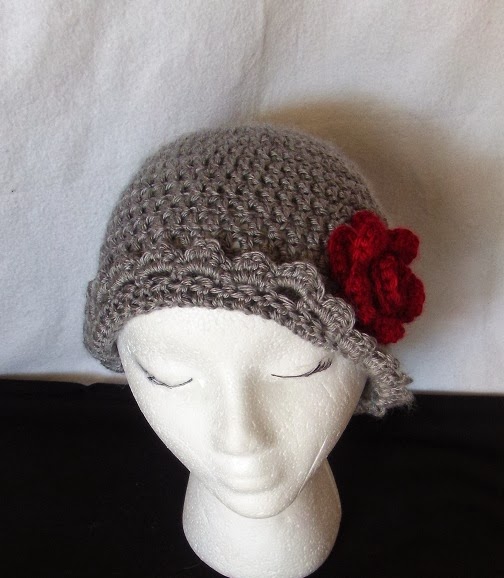
With a little imagination, you can add some embellishments such as flowers, ribbons, pompoms, etc. as shown in the photo below:


How to knit Red Heart Sassy Lace Ruffle Scarf for Beginners

How to knit Red Heart Sassy Lace Ruffle Scarf for Beginners


In the following video tutorial, I show how to knit this lovely lacey ruffle scarf, including how to cast on, knit and finish the scarf. I also show how to easily add another roll/ball of lace to create a longer scarf if one roll is not as long as you like it.
 
Using one roll/ball of the Red Heart Sassy lace and using 6 stitches, will result in a scarf approximately 40-44 inches long when knitting.
 
I also have a quicker intermediate/advanced version of this video through my youtube channel which also gives the extra same tips as I share in my beginner video, only the tutorial portion is much quicker, without so much repetition that is helpful to beginners. Here is a link to my youtube channel that has all kinds of fun video tutorials for beginners to advanced crafters: https://www.youtube.com/channel/UCEiVJTjTjzHcKUsIS1vQJ7A


Here is the lace ruffle scarf video for beginners:


Saturday, February 14, 2015

Quick Easy Knit Ruffle Scarf Pattern Tutorial for Intermediate and Advanced Knitters

Instructional Video Quick Easy Knit Ruffle Scarf Pattern Tutorial


I think Red Heart Sashay brand yarn seems to be super popular in the creation of the Ruffle Scarf!
 

I have had some requests for a quicker video of the original instructional knitting video for the ruffle scarf, without so much detail for beginners. I am happy to say that I have finally made the time to do so. This video is much quicker, and still has a few tips and tricks I have learned along the way, but the actual instructional part of the video is pretty quick. I walk you through beginning your ruffle scarf, then only the first few rows, as you will follow it for the whole pattern. Then I quickly show you an easy way to finish your ruffle scarf that is fast and secure. I mention a couple techniques in the middle on how to combine 2 pieces together with ease and what to do if you run into a knot or separated piece of "yarn" in your shank/skein/ball of ruffle yarn. But, the video is still pretty short and to the point.
 
I hope this is super easy, quick and helpful for intermediate and advanced knitters alike.

FREE Crochet Patter Video Tutorial for Women's Crochet Reversible Boot Cuffs

Video Tutorial for Women's Crochet Reversible Boot Cuffs


I have had so many ladies email me requesting this video tutorial that I mentioned in one of my other instructional crochet video tutorials. So, I have finally made the time to create and post my video tutorial pattern for how to make my reversible boot cuffs. I love these boot cuffs! I made the pattern so they could be flipped over to either show a simple top or a ruffle top depending on your mood or what you are wearing. I also briefly show how to add a removable button which makes these boot cuffs even more versatile as you can remove the button for washing, or you may only want the button sometimes. You can also use this simple method shown in my video to add removable crochet flowers and other decorative items from your boot cuffs.

Check out my video above, and you can also subscribe to my youtube channel to be notified of other videos as I add them to my channel. I have a ton of ideas I am working on for tutorials and I have a lot of fun creating and editing them and sharing them! Please stay tuned!

Newborn Crochet Football Cocoon Pattern

Newborn crochet football cocoon pattern in written form is now available through both my Etsy shop and Craftsy shop.

This is an adorable pattern that is great as a new baby gift or a photography prop! It can be made in the standard brown for boys, or you can even make it in pink for girls.

Etsy shop link: https://www.etsy.com/shop/YvetteMariePatterns
Craftsy shop link: http://www.craftsy.com/user/2734547/pattern-store


Friday, February 6, 2015

Natural Menstrual Sea Sponge "Tampon" Alternative


Natural Menstrual Sea Sponge "Tampon"

aka: Tampon Substitute

 
For some of you this topic may be a little squeamish, if that is so, you may find one of my other topics better suited to your taste. But, if you are anything like me, you might like to have different or healthier choices for your health and personal care. And well, we are all human, we all have experiences with things that might be viewed as embarrassing to discuss or share. But, sometimes if one person shares or talks about it, others find it easier to do, say or ask about and might just find a better or different alternative to something that might not be working so perfectly. So, here we go...
 
After a lot of research, I chose to try the natural sea sponge "tampon" aka: tampon alternative for a healthier alternative during menstruation. I was really nervous the first time I tried them, but now, I will only use "normal" all cotton tampons if I don't have a means to use the menstrual sea sponges.
 
I will preface this post with saying some of this information is information I found during my research and I am not a medical doctor, blah, blah. I am not authorized to diagnose/cure anything, etc. Most of this post is to share my experience and opinion about using the natural sea sponge "tampon" vs. standard tampons, and that's it. That way you can make your own informed decision as a human being with a little more information than you might already have.
 
Here is what I found out about the whole tampon issue in general after doing some research. So, it is my understanding some tampons containing cotton and rayon may be a higher TSS risk than if they were just plain cotton tampons such as organic ones you find in a health store. My understanding from my research via the internet, is because of the rayon. From what I read, the rayon is more susceptible to growth of bacteria, etc. which could possibly lead to TSS or other infections. It is my understanding that pure cotton, does not carry as much of a risk, though not completely innocent either.
 
In my extensive research on the internet, I couldn't find any reports from women who have used the natural sea sponge "tampons" and TSS. However, that doesn't mean there are no reports at all. They just may not be published on the world wide web. I have researched a lot, and so I do not have a record of every website I viewed, sorry. But, as will anything you insert like tampons, you would always want to make sure to use common sense in making sure your hands are clean, and the tampon is completely clean, sanitary and of course you don't leave it in place for a ridiculous extended amount of time.
 
I also read about some women who reported they had less cramping and lighter periods, reduction or complete cessation of bladder infections & vaginal infections, etc. So, can do some more research on these topics if you are so inclined as well. I also read that they are quite absorbent in comparison to their weight. (Weight to absorbency ratio or something scientific or technical).
 
I recommend doing some research before making your purchase. Find a reputable company that harvests the sea sponged for this purpose. Some women I read about just went to an art/craft store and purchased some sea sponges for use in arts/crafts. While this probably worked for them, I would not personally recommend it. And, my yoni probably thanks me. I found a place that harvests sea sponges for the purpose of using them during menstruation. They advertise that they clean them thoroughly to remove as much debris/sand, etc. as possible. With a lot of companies that sell them, you also have a choice of bleached or unbleached depending on if are concerned with chemicals in your body. Again, I think my yoni prefers no bleach, thank you.
 
Natural menstrual sea sponges come in different sizes just like normal tampons. Some women actually use 2 together for added protection. Some sets are sold in a variety pack and some include a couple of one size. They are all a little different shape/size since they are natural. But, you can cut them to size and shape for your comfort. Mine just happened to come with one a little bigger than the other as you can see in the photo. They reminded me of a one regular and one super once I got the hang of using them. Here are a couple photos so you can see the size in comparison to my hand. 


Once I received my set I rinsed them  for a long while under running water as hot as my hands could stand. I read that it is not recommended to boil them. I also sanitized them with hydrogen peroxide after inspecting them for any debris that might be left from the company I purchased them, which they recommended as well. Then, I put some super hot tap water in a glass bowl and added a dropper of colloidal silver and about 10 drops of tea tree oil and soaked the sponges in it. I squeezed the sponges to soak up the colloidal silver and tea tree oil throughout the whole sponge. I let them sit for about half an hour or so. Then I rinsed them again very thoroughly to remove the colloidal silver and tea tree oil, and let them dry on a clean, dry washcloth. I keep them in a clean dry area, wrapped in a clean washcloth so they have air, and aren't caged up in an air-tight container to breed bacteria and stuff.
 
Once you are ready to use your sea sponge, you will want to wet it and squeeze any excess water out and insert as you would a tampon that has no applicator. Depending on the size of the sponge and your anatomy & comfort, you may want to twist it to make it slimmer for easier insertion. Now, here are a couple tricky things, your sea sponge does not have a string for removal. Some women add an all cotton string by sewing it into the sponge for easier/less messy removal. I would recommend making sure to sew it not very close to the edge just in case the sponge rips when you pull, but not way in the center either, which may be uncomfortable for removal. I would probably also recommend changing the string frequently. And, make sure you don't use one that could chafe or cause any harm, abrasion, cut, etc. while removing. Just my opinion.
 
When you first begin using the menstrual sea sponge tampon alternative, you will probably want to test them out at home to make sure what size is best for you. Check them more frequently than you might a regular tampon at first, just to make sure. And, you might want to wear a backup liner or something until you get used to what is best for you. You might even notice some nice changes in your flow or other things that other people reported, as I found when doing my research.

You will definitely want to make sure you will have access to a restroom with a sink right in the stall if using these. Each time you remove it, you would completely wash it thoroughly and reinsert, or you can keep another one handy for insertion, of course make sure you wet it with clean water first. Then you can thoroughly clean the used one for the next change out. If you choose not to attach a string for removal, you may have to bear down just slightly then insert a finger to remove it. (Yes, this may be a little messy, but, in most cases not too bad, again, more convenient if the restroom has a sink in the stall).

I recommend keeping something like hydrogen peroxide handy if you will be reinserting the same one. I would wash it very thoroughly and then rinse with hydrogen peroxide, then rinse under very hot running water to get out all the hydrogen peroxide, then reinsert. Of course, be careful not to burn yourself with the very hot water. I know it sounds silly to say it, but, it's kind of like people who buy super hot coffee at a drive through and then complain they got burned when they drank it, when there is a warning on the lid, too...be responsible.

I found some of the differences of the menstrual sea sponge in comparison to regular tampons are:

Menstrual Sea Sponge:
* They are inserted wet (not drenched), so they are much more comfortable and don't scratch you inside (more comfort, less infections and such...win-win)
* They conform to your natural curves and shape so they may feel much more comfortable, most times I could not tell I was wearing one, which is not always the case with normal tampons 
* They are reusable therefore earth friendly/green living/eco friendly (I think most companies recommend using fresh new ones every 6 months or so.)
* Cost friendly (I think my set was about $10 plus a few dollars for shipping and if I choose to re-use them as recommended for 6 months, well...you can do the math vs. 6-8 dollars per package organic all cotton one month supply (maybe, depending on your flow)
* Not as convenient as normal tampons if you don't have a sink handy in your restroom stall
* Takes a min or two each time for removal/thorough rinsing and reinsertion
* No applicator or string for removal = a little more mess, but not usually too bad


Regular tampons:
* Dry, not so comfortable to insert/wear sometimes
* They are uncomfortable since they are dry and stiff
* More costly, especially if you prefer organic all cotton
* Waste (not eco-friendly, not re-usable, plastic/cardboard applicator, wrapper, box, etc.)
* Convenient to carry for use and disposal
* Some research shows higher risk of infections compared to organic all cotton tampons or menstrual sea sponges
 
There are other tips and tricks you may find on the internet, too. This page shares just the ones I have personally used and have worked for me. I am happy to answer any real questions if I can, if you leave a question in the comments below. I will delete spam, rude/distasteful comments.

 You can purchase natural menstrual sea sponges through various sources such as Amazon.com, Ebay or directly through some companies who specialize in either earth friendly/eco friendly products or even just green health and feminine products.
 
I hope this helps you make a more informed decision when choosing to try or not to try natural menstrual sea sponge tampon alternatives.

Friday, December 26, 2014

How to Knit or Crochet Ruffle Scarf tips and tricks

How to Knit or Crochet Ruffle Scarf tips and tricks


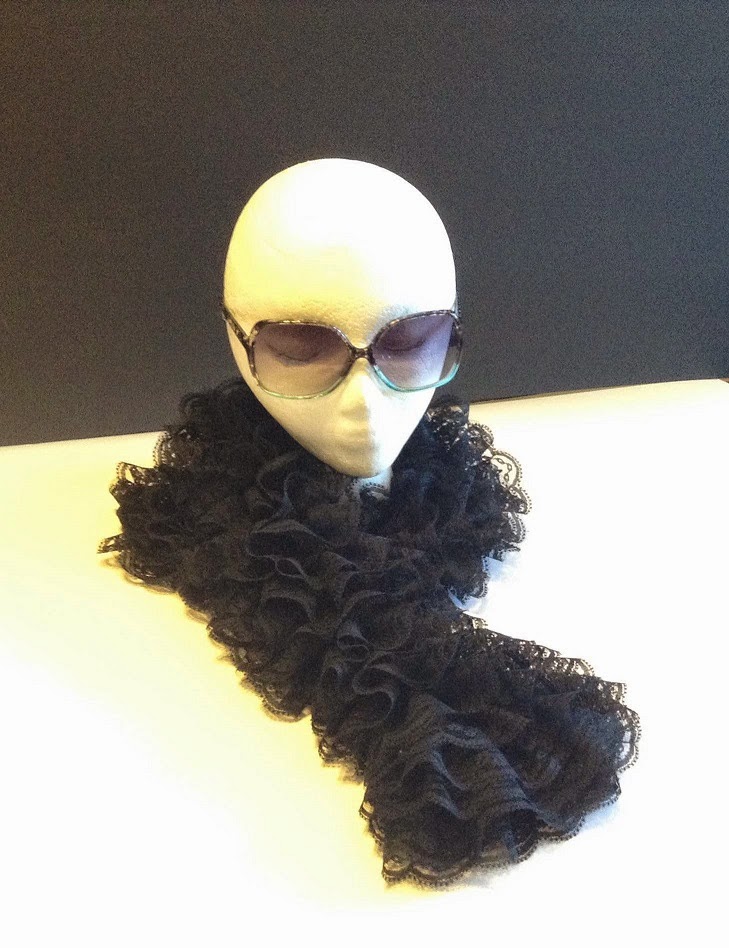
Ok, so just sharing a little info about making the ruffle scarfs that are so popular this time of year...when you crochet the scarf, depending on which crochet method you use, you will get a spiral scarf or you will get a scarf that has sort of a spine with ruffles falling to one side...the "real" crochet method gives you the spiral ruffle, the "no-crochet" crochet method gives you the spine. Please message me if you have any questions. Have a beautiful day!

Here are 2 video tutorials on how to make the ruffle scarf. One is for knitting and the other has 2 different ways to crochet.
 
How to crochet Red Heart Ruffle Scarf 2 different ways video tutorial instructions:


How to knit Red Heart Sashay Ruffle Scarf video tutorial instructions:


Monday, December 22, 2014

Free Crochet Rose Flower pattern instructions

Crochet Rose Flower Pattern Instructions


Here is one of my favorite crochet rose flower patterns. It is super quick and easy! You can make it in a variety of colors and add it to a hat you make or a hat that you buy. Or, you can even wear it in your hair as an accessory all by itself.

Once you complete your flower, you can either sew or glue felt on the bottom and sew or glue an alligator style hair clip to the felt to make it removable from the hat or wear in your hair. Or you can sew it to a hat so that it is permanent.


I will be posting a variation of this flower soon, please check back!


Here are a few of my youtube videos that may be helpful if you are a beginner to learn how to do the simple stiches required for this project.


Basic chain foundation stitch:
https://www.youtube.com/watch?v=DDBE1ORZ4Wg


Single crochet stitch for beginners:
https://www.youtube.com/watch?v=q71XypWx2Rs


Double crochet stitch for beginners:
https://www.youtube.com/watch?v=8xTUXMLBmPI

Pattern:

CH.......Chain
SC........Single crochet
HDC....Half double crochet
DC.......Double crochet

Row 1: Leave an 18 inch tail or so and begin by creating a chain of 60, turn.
Row 2: Skip the first 2 CH and DC into the 3rd CH and each all the way to the end, turn.
Row 3: SC in the same space (first CH space where you turn, see photo), 5 DC in the 2nd CH space, * 1 SC in the next CH space, 5 DC in the next CH space *, repeat from * to * all the way to end of row. Leave an 18 inch inch tail to tie off later.

Here are photos to go along with the above instructions for beginners:

Row 1: Leave an 18 inch tail or so and begin by creating a chain of 60, turn.
Row 2: Skip the first 2 CH and DC into the 3rd CH and each all the way to the end, turn.


Row 3: SC in the same space (first CH space where you turn ~ where the silver crochet hook is pointing in photo below), 5 DC in the 2nd CH space (where the blue crochet hook is pointing in the photo below), * 1 SC in the next CH space, 5 DC in the next CH space *, repeat from * to * to end of row. Leave an 18 inch tail to tie off later.


This is what it will look like once you have completed the 3rd row:


Now you will begin to form your flower. Notice the front and the back of the row. The front of the row is the left photo, showing the edging. The photo on the right shows the back, you can see the edging does not show. Make sure the front is facing up when you start to wrap your flower.  


With the top facing you, and the long 18 inch tail of yarn in your yarn needle (the tail closest to the end you begin wrapping, you can wrap from either end depending if you are right/left handed), begin wrapping your flower as shown in the photo a little at a time. Turn your flower to the side as shown below and every 1/2 inch or so, place a stitch through a couple layers of flower to secure it as you wrap it as shown.


This is what the bottom of your flower will look like as you keep wrapping and sewing. When you get to the last petal, tuck it a little toward center when you stitch it (shown in photo on the right), otherwise is sticks out kind of strange from the edge when you look at it from the top.


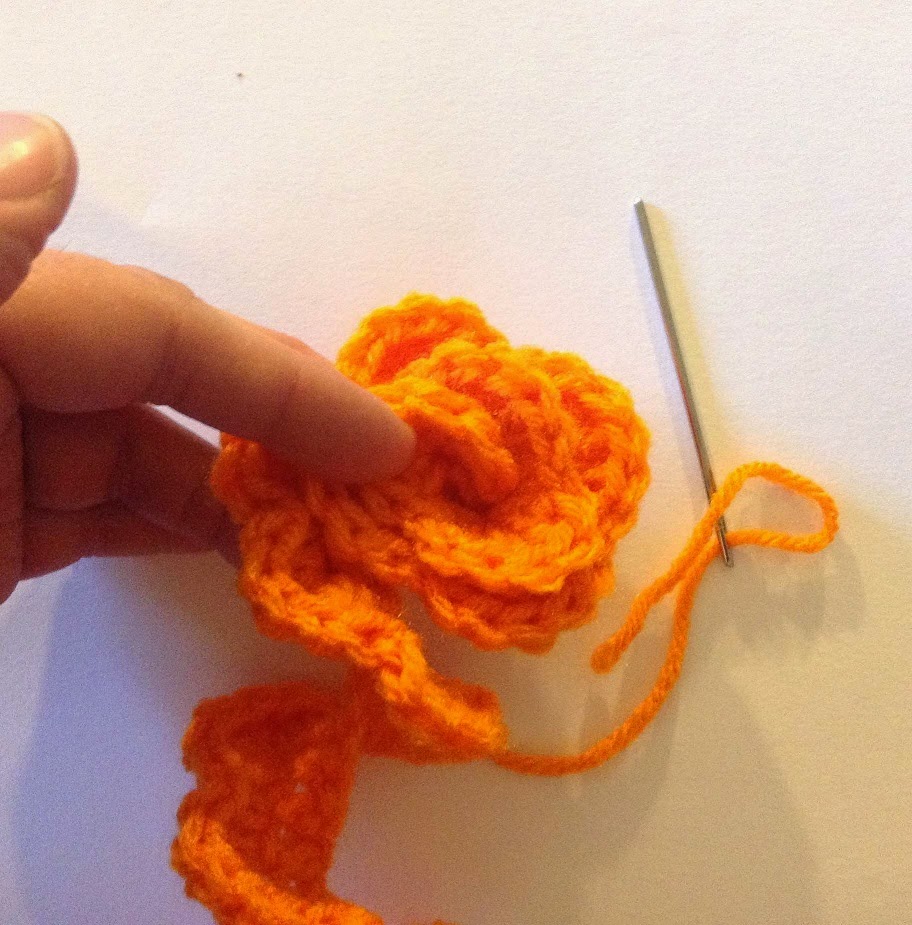
Now you can use the needle in the other long yarn tail to secure that edge down, too. Stitch the second yarn tail close to the first one so you can tie them off in a knot together securely as shown in the next few photos. (In the first photo, I'm pointing to the second yarn tail to begin using).


Your crochet rose flower is now complete and ready to attach to whatever you desire. Or, you can glue or sew a piece of felt to the bottom (in a matching color of course, similar to the top left photo in the cluster below) and then either glue or sew an alligator hair clip so it is removable from your hat, or you can wear it in your hair, or attach to another item.


Sunday, December 21, 2014

Quick Easy Delicious Veggie Quiche Recipe

Quick Easy Delicious Veggie Quiche Recipe


I have been craving quiche lately, for like the last few weeks, for some reason. So, I finally decided to take the time to actually make one. I am not sure why I didn't already. A crust-less quiche is really easy to make and hardly takes any time at all. And, if you love quiche like I do, it is worth the little time it takes. And, it can be pretty healthy depending on what you choose to put in it, and you have breakfast or lunch for days if you make one big enough for leftovers!

I just threw some items together that I had available in the kitchen and yummy for my tummy! So, the following recipe is for a small quiche, but it can easily be doubled. The one I made fits approximately an 8 inch square or a small rectangle like the one in the photos. I prefer glass pans, but you can also use metal. If you choose to use a non-stick baking pan, you may want to just watch the time as the time below is for glass baking dishes.

Quick Easy Delicious Veggie Quiche Recipe:


6 eggs
1/4 green pepper, chopped up into small pieces
1/4 med. onion, chopped up into small pieces
2/3 cup frozen spinach, thawed
2/3 cup mayonnaise
real butter (enough to sauté peppers and onions)
salt and pepper to taste if preferred or add after cooking
1 cup fresh shredded Cracker Barrel cheddar cheese

Preheat oven to 350 degrees.

Sauté the chopped peppers and onions in the butter in a medium pan. Set aside.

Thaw the frozen spinach under hot water for only a minute or so. Squeeze out excess water and set aside.

Use electric beater to mix eggs and mayonnaise about 30 seconds 'til thick, fluffy and fully mixed.

Add peppers, onions and spinach and mix in with a fork. Mix in the freshly shredded/grated cheese.

Pour into a buttered 8 inch glass pan (or similar size).

Bake @ 350 degrees for about 23-25 minutes for 8 inch glass baking dish, should be slightly browned and just pulling away from sides of pan. Top will be a little shiny, but not wet. And, will be firm not jiggly when removing from oven.

Let cool a few minutes to set before serving.

Alterations:
You can change or add veggies. If you add ingredients, make sure it still fits in the size pan recommended.

Sunday, December 7, 2014

Would You Work for 50% Less Pay Today?

If you walked into work today, and your boss came up to you and said, " Hey (insert your name here), "Would you work for 50% less pay today? I want you to put all your heart and soul into your job today, and I just don't really feel like paying you for it though. I know you've studied for years, you are a master at what you do, you've perfected your work, it's amazing and unique, but........", what would be your response? I am sure most of you are thinking, "Yeah, right! I was going to ask YOU for a raise!" and laugh or punch someone in the nose.


In both fields that I choose to call "work" to generate & create money for my family, I have been asked to give large discounts or even give my goods/services/time away for free, repeatedly. (I now know I am drawing this experience to myself.)


Well, as an artisan, I would like to officially ask everyone in the world, to stop expecting artistic people who make a living off of their talents (natural talents or otherwise), that we would give away our work for free. This includes all artists, such as artists that paint, draw, sculpt, crochet, paper artists, handmade jewelry makers, people who sew, musicians, photographers, any kind of artist or creator, oh, and people who work in the healing arts as well, like energy healers/quantum healers as well.

I'll give you an example or two:

I was in a craft show last year, a couple women passed by my station, and one woman commented to her friend about the price of one of my handmade items with a puff as they walked away. I was not having a yard sale in my front yard getting rid of old junk. It was a handmade (by me) lacey crochet washcloth, that I think I priced for somewhere between $4-$6. Please let me explain as an artist, that I bought this particular small skein of yarn which may have cost $2-$3 or so with or without a sale, then it took me probably 1 1/2 - 2 hours to complete and finish it. So, in the end, if you think about it, I just made $2 per hour, at most. Well, wait, that doesn't include the time to shop for the yarn and the gas and wear & tear on my vehicle and in this case the cost of the booth, set up, business cards, advertising, etc...well, you get the picture. Or, the time it took for me to perfect my craft (many years, but we don't need to give away my age here, haha) so that my items don't look cheap ( I like high quality, beautiful handmade goods) and the fact that I like to create my own patterns, and not just copy a pattern out of a book. That way my clients get something beautiful and unique and high quality.

Another example:

I am also an energy healer. I am a certified practitioner of Thought Field Therapy (TFT), and, I am a certified Access Consciousness BARS practitioner and Energetic Facelift/Body Lift aka: Life Lift/Love Lift practitioner. I found TFT 8-9 years ago or so, and began my deep study of energy healing methods and natural healing, and quantum physics as it relates to physical/emotional/spiritual healing along with many other sources to not only help myself but those around me live in more peace and facilitate emotional & physical healing in a different way. I was and still am a sponge to the information surrounding this amazing field of possibility! And, let me tell you, it works! Not only in your head (sorry naysayers), but quantum physics and science back it all up! I may not have gone to an expensive college and paid many thousands of dollars, however, I can guarantee I have studied things that are taught in college and some things that are left out! And, I have paid to take the classes, tests & get certified to practice certain methods and help others and used them in my own life to facilitate change and healing emotionally and physically.


Now, in these energy healing/quantum healing/consciousness healing fields that I have chosen to use, they have been around for many, many years (TFT over 30 years and Access Consciousness over 20 years ago, and Matrix Energetics almost 30 years) and they have had thousands upon thousands of people all around the globe who have benefited from them (emotional healing & physical healing even when standard practices did little or nothing in some cases. And, in some cases even instant change or healing of emotional turmoil that took many years and many, many thousands of dollars of standard therapy little or no results, or even instantaneous or very quick physical healing when nothing else seemed to work.) I remember reading of a case of a woman who had an infection for almost a year, that would not go away, and when she used one of the methods mentioned above, she saw a change within a day, and the infection cleared up in about a week...hmmmm..coincidence? Maybe, maybe not. There are hundreds or more cases I could share that I have read about in case studies and a few that I have been part of with joy!


So, then I find that in the field of alternative healing specifically, people expect that you will just give it away. Now, I am really not sure, it might be the fact that they think that a person in that field is a pushover because they operate from a place of love and compassion or something, or that the healer themselves is afraid to command a certain fee, I see that many people in the energy healing field and creative arts field, barely charge anything, (trying to make a living for their family and doing a great service to the world) and then, I find a few scattered here and there, that actually charge a rate that shows that what they have to offer is of great value and that they also value themselves and their time. When receiving these types of healing, in most cases there are many more shifts and changes than just the ones you are expecting. For example, your knee may be in pain and you go to an energy healer, after your session, you find that your relationship with your mother suddenly heals miraculously and you have a lot more ease, space and peace in your life. Or, you no longer have another issue in your body going on, or an infinite number of things in your life change with ease and beauty. These types of "miracles" are more common than not in the field of energy healing.

My personal opinion, is that it should cost no less than $100 per hour for a certified energy healers' time. I'm not talking about the quacks at the traveling fair (although some aren't).

I am not meaning for this post to be negative by any means, I am hoping to bring awareness to the fact that just because it is not store bought, mass produced or done by a person in the medical field, and may be something outside of the box, outside of your box, does not mean that it is of less value. In my experience, it is of tremendous value, and normally the artist or healer, it is their life passion, or one of their few life passions and joys that propels them in the field. And, in most cases, they spend many years perfecting their art or study and continue to study it and morph it into something greater and more magnificent!

I encourage you to go out and show appreciation to a local artisan by choosing to do business with them and maybe even creating a lasting business relationship!

Sending Love and Light out to all!

Friday, July 4, 2014

How to Price Your Work as a Artist And/Or Crafter

This can be a tough question, but I will share some things I use to help me price my arts & crafts. There is no "one way" to do this.


I know standard retail is way different, however, I am an advocate of artisans of all kinds (since I am one and I know the time and energy put into my creations.) I am not just talking about art as in drawing/painting, etc. I am talking about any item you create that you sell. This could be a scarf or other piece of apparel, jewelry, a painting or drawing, handmade purse/wallet/diaper bag or other accessory, a clay pot, a bra, or whatever you create. You are an artist. A unique creative individual. You are probably an expert or specialist of sorts in your art/craft abilities. You have probably put many hours and/or years into studying and honing your unique craft. Most likely you create unique and maybe one of a kind items or take special requests, and you probably put a lot of detail and time and energy and love into what you create. Your expertise and uniqueness is worth a lot!


Here are a few questions you can ask yourself to help decide how much you want to receive for your unique creations.


Are you new to selling your items? If so, do you want to feel good about the money you are receiving or do you just want to sell things cheap to get a customer base started? Keep in mind, these customers may become accustomed to your cheaper prices and when you feel it is time to raise them, they may not understand. I feel it is better to stay consistent and adjust prices as supplies increase and you should also allow yourself an increased markup as inflation happens naturally.


How many hours (weeks) did you put into your creation? This is a tricky one, as most artisans seem to find it difficult to price their items this way.
Do I want to make a specific dollar amount per hour, or do I want to make a specific price per piece?
Do I want to give the impression to my buyers that I don't value my uniqueness and/or my time?
Isn't my time just as valuable as the next person (artist or not)? Your time is valuable as an expert in your field. People are paid for their expertise, we are all an expert at something.
Would it feel good, in the pit of my stomach to put (fill in dollar amount) price tag on my creation?
This is the question I use the most! If it doesn't feel good, I go up or down to find a price that feels good. I trust my innate inner wisdom to guide me. That is what it is there for. I feel that it would help a lot of people in all situations make better decisions.
Who are you selling to? Who do you want to sell to? (Who is your target market?) Are you just selling to friends (which may not always be the best choice for customers, another article, another time.) Do you want to sell to customers who are just looking for cheap selling items, or would you like to have a customer base that values you as an artist & expert in your field? The latter will return to you for specialty items who appreciate your talents and expert service. And, they will refer their friends to you as well. They will be on your side. And, yes, selling to friends can be fun and get your item shown, however, in my experience, it is not as beneficial. I have been in many business ventures over the last 20 years or so. I've tried selling makeup & beauty products and other things, hoping to have a home business and got burnt. I had makeup parties where I had friends host for me. I ended up giving away promised product in hopes for sales and no one ended up buying. So, I ended up giving my hostess gifts to my host out of my own pocket and barely receiving enough to cover my cost for the hostess gift or worse, paying out of pocket. And, I never had a return customer. I know this doesn't always happen, but it happened to me quite a few times. And, I have given or sold my arts & craft items to people I know in hopes or promises of them showing everyone and helping me get sales, and this has backfired as well. I ended up feeling used so they could get something cheap from me. I felt undervalued as a friend. This can hurt your relationships. Also, shouldn't the people you care about value you the most? Shouldn't they want you to succeed? I want the people I care about to succeed and feel great! I heard a story once about a man who was finally able to open his own mechanic shop, it was his dream. He was very good. However, people he knew were always asking for him to do the work they needed for cheap or free. Of course he agreed since they were people he cared about and wanted to give them a great deal and figured he would get referrals, too. Well, what ended up happening was his friends would tell people to go to him for cheap labor. He ended up broke. This is not the way I want to show my friend that I care about them and value them for who they are as a being. If your friends truly value you, they will refer people to you because they believe in you and are excited to help you succeed. And, they should not be quoting prices for you either. This is another area that could cause major problems.
Are you selling an item at this cost just to rack up the sales numbers in your online shop?
Or do you want customers who value you from the start for your creativity, that will return to your shop for more unique purchases and will refer their friends, because you have an amazing quality product and your excellent service? I have seen this done in some online shops where I sell my products. I see others selling their products for the cost of the supplies or even cheaper (I'm not sure how they do this, it appears they are paying people to take their merchandise off their hands to me). Or it appears they only tack on a dollar or two, when I know fair well, the item took them hours to make. This not only sells themselves short, but it also is unfair to other artisans who expect to make a profit for their time and effort and creativity (which if you haven't got it by now, is completely fair, you should make a profit) and help make a living for their family. An artisan selling things for super cheap just to get sales in their shop is just unfair. There's nothing wrong with having a great sale, that is not what I am talking about here.
What are similar items from artisans selling their items for (not retail, mass produced items)? (This question is the one I concern myself with the least, as I don't like to compare myself to anyone else...this doesn't feel good. And, I personally don't believe in competition in this area. There are plenty of people who will be interested in your creativity or mine. It is all a matter of choice. I have told this to people who are artists that I know that have a lower self esteem and worry that no one will be interested in their art. This idea is wrong! First of all, everyone that sees this persons art, is absolutely blown away and falls in love with it. This is where the issue of self worth plays a part. This person has been an artist at heart for most of their life and could be in galleries and is too scared to put their work out there for the world to see and possibly get rejected by someone. I have repeatedly told this person that it is a matter of choice. There are BILLIONS of people in the world. I am sure some of those people, (probably a lot) will love this persons art! I have yet to find a person who has put down this persons art, ever. Many people have this persons artwork hanging in their houses for free (yes, free) because this person will only give their art away due to fear of charging for it. You can also refer back to the last question. I don't know how they priced their item or why. And, frankly, I don't really care. They have to place a value on themselves, their time, and their product. That has nothing to do with my value of myself, my time or my creation. I have different values and reasons. Maybe they just haven't put the time into researching or don't know where to begin on how to research or price their items. That is OK, too.


These are just some of the questions I use when pricing my creations. And, I am very diverse, so I have to really put myself into this. I create smaller items like wallets, scarves, infant hats all the way up to portrait drawings that begin around $300 minimum. That being said, I know portrait artists who sell items similar to mine and their minimum price is about 3X-4X that amount. They command it and receive it and their customers are ecstatic. Am I worried, concerned or jealous? No. I want that person to feel good and succeed beyond their wildest dreams! Will I adjust my price? When it feels right for me to do so.


Love, Joy and Peace to all!


Saturday, June 28, 2014

I Love to Draw!

One of my many pleasures is drawing! I love to draw people, I love to feel the energy an the expressions on the faces I draw. It takes many weeks to draw a single portrait. I spend many hours perfecting just one area of the drawing to elicit realism. I put on my favorite music and get high on it, which helps me get into and feel my creative energy and then I am in the flow and feeling it. If I am not feeling it, I walk away and come back at a later time to create some more. There is not fighting or wrestling with the art to complete it, it just comes naturally out of me.


Here are a few of my favorite drawings that I have done...


https://yvettemariesfineart.blogspot.com/b/post-preview?token=dFYl5UYBAAA.iyQ8YgG9SWPmTnC4VMjcpw.baB9qcSyiFgceJy5R1XcTw&postId=3371351945585279400&type=PAGE


Saturday, March 22, 2014

How to Knit Red Heart Sashay Ruffle Scarf


Free Instructions: How to Knit Red Heart Sashay Ruffle Scarf


If you would prefer a video tutorial, please click here: https://www.youtube.com/watch?v=WVGHP8-NS94


 Please do not copy, sell or offer these patterns as your own. Please share a link to my blog here for other's to find my free patterns, in doing so, I am able to offer more free patterns to everyone.


Skills: 
You will need a basic knowledge of knitting, casting on and casting off. 


You will need: 
Knitting needles (size 9 or 10)
Scissors 
Your choice of mesh ruffle yarn


Notes:

A. Normally, using a different size hook or pair of knitting needles will not make a difference in your work when using the different brands of ruffle mesh yarn. The holes are already created for you to work with, so when you cast on, you are not concerned with being a tight or loose crochet/knitter. It does not really matter. I prefer to use a size 9 or 10 wooden needle, because it is what I have found to work well in a comfortable manner, for this yarn. I find the work can slide easily off metal or plastic needles, so I just prefer to use wood or bamboo or something similar that is not so slippery.

B. When working with this particular ruffle yarn/fabric (there are more than a couple brands on the market), if you find a knot in your yarn/fabric as you are working it, you can do one of 2 things: (either one you choose, you will normally not see it once your scarf is complete!)

     1. You can work right over the knot as if it were not there….or…

     2. You can usually untie the knot, and overlap the fabrics (one facing one direction and one facing the other, just a few inches will do), so that you have 2 layers crisscrossing and work right through them following the pattern without interruption.

     3. I recommend unrolling your entire skein of yarn as shown below, rolling it onto a toilet paper roll or paper napkin roll. This takes about 45 min or so, but it will dramatically cut time of working making your scarf, because it is already stretched out for you and ready to use. Otherwise, you have to stretch it out  a few feet at a time as you work, and this does take way more time.

4. The number of stitches you cast on can vary. I normally use 8-10 stitches and I knit until I have used the whole skein. If this is your first scarf, you may want to try 6, 8 or 10 stitches, knit a few rows to see how wide your scarf is and see if you like the width. You can easily pull out the work and start over, as this only takes a few minutes to re-create. Less stitches = narrow, more stitches = wider scarf.

Tips for working your pattern:


Tie a knot in the end of your yarn/fabric leaving about ½ inch tail. Don’t trim too close, as it can unravel a little easier when washing, leaving a short tail is more secure I have found. If will not show when your scarf is completed.


You will be working into every other hole. This gives you the ruffle effect that you won’t get if you knit into every hole. Notice at the top of the photo, there are small “tracks” or stitches to create the larger stitches you will be working with. You will be working in the larger holes, skipping every other large hole.


Notice the bottom edge of the yarn. It is different than the top for the border effect. Some yarns have glittery threads woven through it, or pompoms or other décor for the border/bottom. 

I use the very top row to cast on and knit with as shown below..


Working your knit pattern:


First fold your yarn over a few inches like the photo shown below, lining up the first few holes as I am pointing out below. Fold toward the front, as this will hide it as you begin working.


Cast on your stitches, by inserting your needle from front to back, skipping the next hole, and coming around to front again and inserting needle again from front to back into next stitch/hole. Repeat until you have 6, 8 or 10 stitches cast on your needle (this is up to you as I mentioned above. Notice, the first 2 stitches you cast on, will be double because you folded over the first few inches. You will work the layers together as if they are one layer. See next 3 photos below for what this will look like.


Once you have cast on the number of stitches you choose, you will begin knitting in a very similar fashion to knitting with yarn, except that your stitches are already created for you, and you don’t have “free yarn” to wrap around the needle, you will be using the existing holes to do this. Begin knitting by skipping the very first hole available of the working yarn as shown below. Insert your needle from front to back as you would when you normally knit. Take the working yarn, skipping the first hole, and place the next hole over the back needle (normally this would be a “yarn over” with normal yarn. Complete the stitch as you normally would, bringing needle to front catching the ‘yarn over” on the working needle, and dropping the stitch from the needle that the stitches are cast on to. (Next few photos)


Repeat for all stitches to the end of the row, keeping in mind that the last couple stitches will have 2 layers that are worked together from when you folded over the yarn right before you cast on your stitches.


Here is what your first row completed should look like..


Now, you will flip your work over, and continue knitting each row in the same manner until you have a couple feet or so left of the yarn for casting off. You will cast off in the same manner as you normally do, knitting 2 stitches, and pulling the first stich over the 2nd stitch, knit one more so you have 2 stitches on the needle, and pull the 2nd stitch over the first one. Repeat until you have 1 stitch left on the needle.


You will have a tail of working yarn left, carefully, using a crochet hook, pull the tail through the last stitch. Tie a tight knot in the tail as close to the stitch you just pulled your tail through, and cut the left over tail, leaving about ½ inch of yarn (similar to when you tied the knot at the beginning of this pattern. Shake out your scarf.


Congratulations! You have completed your scarf and it is now ready to wear! 

Thursday, March 6, 2014

How to knit or crochet through a knot or hole in your Red Heart Sashay Ruffle mesh yarn

How to knit or crochet through a knot or hole in your Red Heart Sashay Ruffle mesh yarn

Have you ever run across a knot or a hole in your Red Heart Sashay ruffle yarn or other mesh ruffle yarn? Did you find yourself frustrated & tear out all your work and return the yarn at your local craft store in hopes of finding a new one without a knot or hole? To avoid this frustration, check out my short video that shows you how to work around these issues, without losing all that work and wasting time heading back to the store unnecessarily. 

If you have a question about this video or any of my other videos or free patterns, please leave a positive comment or question and I will reply as quickly as possible. Happy Creating!

Friday, February 28, 2014

Free Crochet Pattern Women's Cloche with Ruffle Brim

Free Crochet Pattern Women's Cloche with Ruffle Brim


Please do not copy, sell or offer these patterns as your own. Please share a link to my blog here for other's to find my free patterns, in doing so, I am able to offer more free patterns to everyone.

Crochet Women's Cloche with Ruffle Brim

Special notes about this pattern:
This hat will fit the average adult women’s head.
Recommended yarn:
I prefer to use Caron’s Simply Soft yarn or similar yarn due to the sheen and soft quality. This gives a very floppy soft feel and a beautiful quality appearance to the hat. (This yarn can be found in many chains such as Joann’s Craft store, Michael’s Craft store and Hobby Lobby craft store or similar.)
I recommend hand washing very gently and lying flat to dry. Do not use an electric dryer as your hat will just never look the same (my opinion).

Skill Level/Knowledge:

Single crochet
Half Double Crochet
Double crochet
Fastening off (securely)
Counting stitches
Magic circle (aka: Magic loop)  (Need help with the magic circle/magic loop? Check out my video tutorial here: http://youtu.be/WTh2Eoww5Y0)

You will need:

Scissors
H hook
K hook
Yarn needle

Abbreviations:

CH………Chain
SC………..Sing crochet
HDC…….Half double crochet
DC………Double crochet
SS……….Slip stitch
CT……….Count (stitch count)

Your Pattern:

Using a K hook, create a magic circle (Need help with the magic circle/magic loop? Check out my video tutorial here: http://youtu.be/WTh2Eoww5Y0) and CH 3 (counts as 1 here and throughout the pattern), and DC 9 more into the center of the circle. I recommend tightening and fastening off the tail at this point (pull the tail gently to tighten completely, and tie a couple knots. You can weave in the end once you complete your hat).
Row 2: CH 3, DC in same st, 2 DC in each around and (including super very last stitch that is actually the SS from the previous row, you will only do this on this row), SS into top of the CH from the beginning of the row (from here on out, you will always SS in the top of the CH 3) (CT: 20)
Row 3: CH 3, DC in same st, 2 DC in each around, this time(and the rest of the pattern), do not DC into the super very, very last st, SS (CT: 38)
Row 4: CH 3, DC in same st, *1 DC in next st, 2 DC in next st*, repeat from * to * around to end, ending in 2DC in the last st, SS (CT: 56)
Row 5-15: CH 3, DC in same st, 1 DC in each st, SS (CT: 56)
Row 16: CH 5, skip 1 st, SC into the next st, * CH 4, skip 1 st, SC into the next st* repeat from * to * around to end, you should have 27 chained loops around the brim once you complete. SS into the center of the 1st loop from the previous row
Row 17: working into the center of the first chained loop, 1 SC, 1 HDC, CH 1, 1 DC, 1 HDC, 1 SC (repeat in each loop around entire brim, do not CH 1 between loops) SS into the bottom of 1st SC to close, cut about 6 inch tail, securely fasten off and neatly.
If you have not already tightened and fastened off your beginning tail, do so now.
Congratulations! Your new hat is complete and ready to wear!

Here are a few photos of various fun ways to wear your new hat! Add some crochet flowers, or silk flowers, or ribbons for an added feminine touch!


Free instructions: How to crochet Red Heart Sashay ruffle scarf 2 different ways


Free instructions: How to crochet Red Heart Sashay ruffle scarf 2 different ways


If you would prefer a video tutorial for this crochet ruffle scarf, please click here: https://www.youtube.com/watch?v=eYB86eoZ97U


 Please do not copy, sell or offer these patterns as your own. Please share a link to my blog here for other's to find my free patterns, in doing so, I am able to offer more free patterns to everyone.


I recommend watching my youtube.com video before completing either pattern included here, for additional tips and tricks to help you while creating your scarf. You can view both knit and crochet versions here: http://www.youtube.com/user/YvetteMarieCrafts 


Notes:
A. Normally, using a different size hook or pair of knitting needles, will not make a difference in your work. The holes are already created for you to work with, so when you cast on, you are not concerned with being a tight or loose crochet/knitter. It does not really matter, I recommend the hook size below, because it is what I have found to work well in a comfortable manner, for each of the patterns in the way it is worked up. 
B. When working with this particular ruffle yarn/fabric (there are a more than a couple brands on the market), if you find a knot in your yarn/fabric as you are working it, you can do one of 2 things: (either one you choose, you will normally not see it once your scarf is complete!)   1. You can work right over the knot as if it were not there….or….  2. You can usually, untie the knot, and overlap the fabrics (one facing one direction and one facing the other), so that you have 2 layers crisscrossing, and work right through them following the pattern as if it were a normal layer.


Tips for working your patterns:
There are a couple things you will do with both versions.  
Step 1: (use for both versions), at the beginning of both versions, tie a knot in the end of your yarn/fabric leaving about ½ inch tail. Don’t trim too close, as it can unravel a little easier when washing, leaving a short tail is more secure. It will not show when your scarf is completed. (See next photo)


Both versions, you will be working into every other hole/loop. This gives you the ruffle effect that you won’t get if you crochet or knit into every single hole/loop. I use the very top row to work my stitches. Some people ignore the top row of stitches, and use the second row from the top to work into. Personally, I just use the first, top row to work my stitches. (Notice the difference in the top that you work with and the bottom or border of the yarn/fabric. (See next photo)


I highly recommend only hand washing or hand swishing in a basin/sink with some gentle soap, wring gently in a towel to remove excess moisture and line/air dry only. This will keep your scarf looking as new as possible longer, with normal wear and tear. 

No Crochet-Crochet version (this version works up very quickly and is great for beginners and children!)

Hook size K (recommended for this version)
Recommended # of stitches to cast on between 8-10. Not a lot of difference, 8 stitches will be a little bit skinnier version and 10 a little chunkier. 
In this version you can get 2 scarves at a decent length, using the whole skein for one scarf will result in a super long scarf, which you may prefer :0)
Also, this is a very forgiving pattern…if you miscount, and do 8 instead of 10 for one row (when you were working with 10 all along), you will never notice! Don’t worry about going back for a re-do on that row, just keep working.  Use step 1 above 
Step 2: fold over 4 holes/loops to back of fabric (this will be hidden in the end)


Step 3: “Cast on” stitches to be worked in the following manner: working from front to back, insert crochet hook in first stitch (will be doubled fabric from step 2 for only a couple stitches). * Skip a stitch, and pick up the following stitch from front to back (so you will bring your crochet hook up over the fabric in a sweeping motion to the front, and pick up the next stitch *. Repeat from * to * to cast on the number of stitches desired (8-10).


Step 4: Keeping only the first stitch closest to the hook end, pull that first stitch through the remaining stitches on the hook (including the doubled layer at the other end of the hook). You will now only have one stitch left on the hook. You have completed the first “row” of your scarf.  (Notice in the following photo, how the last 3 stitches farthest away from the hook are layered in 2, this is from the folded portion at the beginning of the pattern).


Step 5: Cast on another row in the following manner: skip the first hole/loop again, and pick up the next one as you did in step 3, from front to back. Skipping every other hole, cast on # of stitches you started with (ex: 8-10…if you started with 8 stitches, you will now cast on another 7 to make a full row of 8, etc.)


Step 6: Once you cast on your row, follow step 4 again. (The following photo is after 5 or 6 rows).


For the rest of the scarf, you will follow Row 4 and Row 5, consecutively until you reach the length desired. Again, if you use the whole skein, your scarf will probably reach the floor. If you choose to make a shorter version, you can make a nice scarf with about ½ of the skein at a time. Make one for you, and one for a friend! :0)

To end your scarf: after completing your last row and leaving about 4-6 inches of yarn, you will have 1 loop left on your hook. Take the remaining tail of the yarn and pull it through the loop on your hook. Tie a secure/tight knot as close to the loop (on top of the loop is better) you just pulled it through and snip off excess leaving about ½ inch for a secure finish. If you are hand-washing and line drying, which I highly recommend, this will be a very secure method of ending your scarf.
If you would like to see an easy quick video tutorial for this finishing method, click here: https://www.youtube.com/watch?v=mtfPl-YoeYw

“Real” Crochet ruffle scarf

(I do recommend some crochet experience with this version, however, watching my youtube.com video mentioned above, can be very helpful if you are a beginner for this scarf.)
You will use a full skein for one scarf.
For this version, you will actually create rows of “stitches” back and forth that you will work in a similar fashion to real crocheting with normal yarn where you crochet a row, turn your work, and then crochet the next row, etc. This version will be fuller than the first version above and more like the knitted version.  Hook size N, or you can use a smaller hook, like K. Make sure to not pull too tightly on your yarn as you work it, you want to have loose holes to find and work into easy.  Follow step 1 (for both versions)
Step 2: fold over 4 holes/loops to back of fabric (this will be hidden in the end) (see photo in first pattern version) 
Step 3: Casting on will be the same as the first version, “Cast on” stitches to be worked in the following manner: working from front to back, insert crochet hook in first stitch (will be doubled fabric from step 2 for only a couple stitches). * Skip a stitch, and pick up the following stitch from front to back (so you will bring your crochet hook up over the fabric in a sweeping motion to the front, and pick up the next stitch (making sure to skip one) *. Cast on 3 stitches in this manner. (Next photo shows the 3 stitches, one hidden in hook)


Step 4: Pull first 2 loops closest to end of hook through last loop farthest away from end of hook. You will now only have 1 loop left on hook.
Step 5: Repeat this 4 more times… skipping a hole with the working yarn, add a loop to the existing loop on the hook, skip a loop and add a second loop to the hook, now you have 3 loops on the hook. Pull the first 2 loops closest to the end of the hook through last loop farthest away from the end of hook. The following photos show me pointing to the 5 stitches you have just created that you will be working in to as you create them each row you work back and forth. I have separated the yarn a bit so you can see the stitches clearly that were created. Get to know the look of these stitches,  you will use them every row.


Step 6: You will now create a chain one (Note: you will create a chain 1 at the end of every row before you turn your work). To create a chain 1, skip the next loop on the working yarn, and insert hook into the following loop, and pull that loop (closest to the hook) through the other loop on the hook. You have now created a chain 1
Step 7: Turn your work, meaning, turn your already worked row around, you are now going to work into those 5 stitches in the individual photos in step 5. The working yarn will be behind the row you are looking at, so you can easily access it to use.
Note: When completing the next row and each subsequent row, try not to pull the yarn too tight, as it makes it more difficult to find the stitches you are going to work into for each row as you turn your work.
Step 8: Insert hook into the first stitch, closest to the hook. Skip one loop from the working yarn, and put the next loop on the hook. You now have 3 loops on the hook (see photos…1st photo shows my chain 1 and then my work turned ready to work back down the row, 2nd photo I am pointing at the chain 1 from before you turned your work and now it is on the hook with the other 2 loops, 3rd photo I am pointing at the stitch from the worked row that you are working back down, and 4th photo I am pointing at the loop you just brought over your hook from the working yarn from the skein (it is white yarn in the photo, may be a little more difficult to see this one).


 Next, pull the loop closest to the hook only through the middle loop. Do not bring it through both loops yet. Now, you have 2 loops on your hook. Now, skip a loop from your working yarn on the skein, and place the next loop on your hook. Again, you have 3 loops on your hook. Now, bring the loop closest to the hook through both of the other 2 loops on the hook. You now have 1 loop on the hook. You have just basically, worked one single crochet (if you can call it that, with this yarn).  You are now going to repeat all of step 8 for each of the 4 remaining stitches across the row. Make sure you skip a stitch when you insert your hook into the next loop and draw up that first loop from the working yarn and again pulling up the 2nd loop from the working yarn. This will keep things comfortable, and not too tight, and it will create your ruffle nicely.
Step 9: Repeat this process for the entire skein of yarn/fabric. When you get near the end of the skein, make sure you have at least 4-6 inches for your finishing. You do not have to work a full row before finishing, if you happen to work ½ a row, and you have the 4-6 inches needed to finish, you can complete the “end your scarf” directions from this point. 
To end your scarf: after completing your last row and leaving about 4-6 inches of yarn, you will have 1 loop left on your hook. Take the remaining tail of the yarn and pull it through the loop on your hook. Tie a secure/tight knot as close to the loop you just pulled it through and snip off excess leaving about ½ inch
for a secure finish. If you are hand-washing and line drying, which I highly recommend, this will be a very secure method of ending your scarf.
If you would like to see an easy short video tutorial on how to end finish your ruffle scarf, please click here: https://www.youtube.com/watch?v=mtfPl-YoeYw

Congratulations! You have now finished one of the crochet versions of the ruffle scarf!